

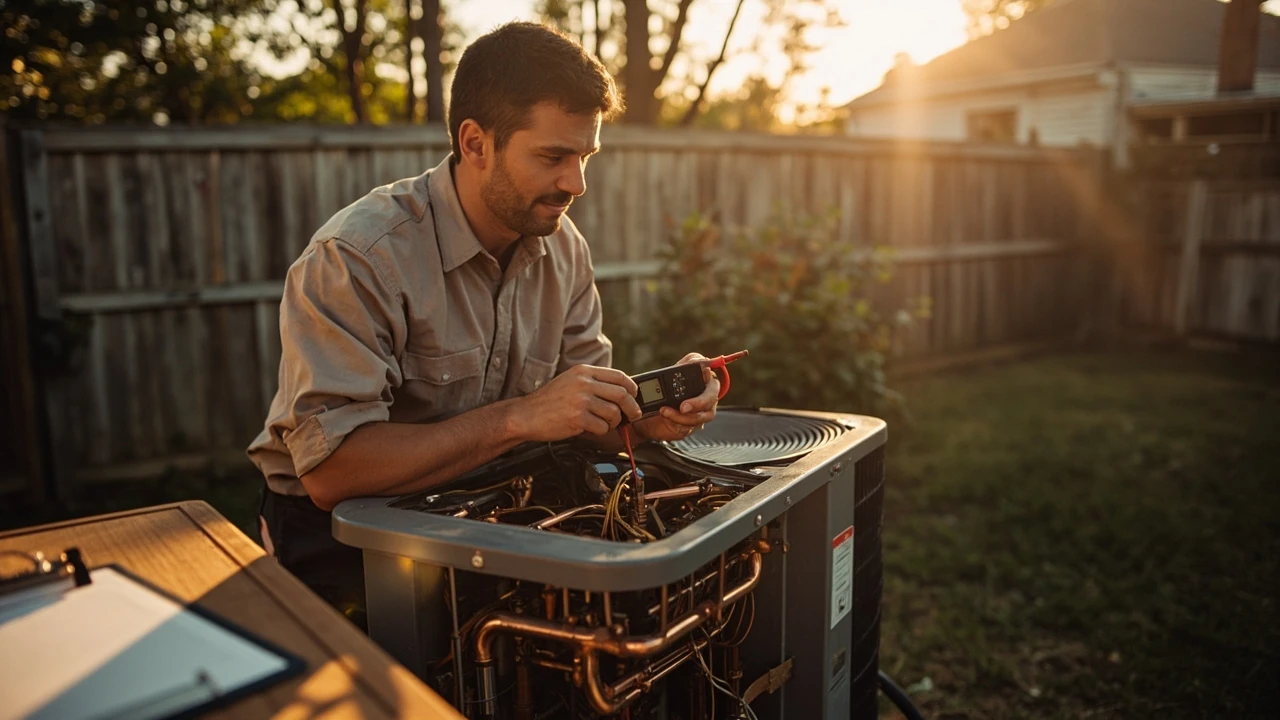
Central air conditioner repair: what it really involves
Picture the first hot Saturday in June. The thermostat reads 78°F, climbs to 80°F, and the supply vents feel like a hair dryer. A central air conditioner that worked fine last fall is now silent, blowing warm air, or short-cycling every few minutes. That is the moment most homeowners start searching for central air conditioner repair, and the moment that separates a small service call from a multi-day project.
Central cooling is mechanically simple in concept: a compressor pumps refrigerant through an indoor evaporator coil that absorbs heat, then an outdoor condenser coil rejects that heat to the outside air. In practice, the system is a chain of electrical controls, refrigerant pressures, airflow paths, and condensate handling. A failure in any one part can look identical to a failure in another to an untrained eye, which is why a structured approach to central air conditioner repair saves both money and time.
This guide walks through how a careful homeowner or new technician can triage a cooling problem, which repairs are realistic as DIY projects, which fixes demand a licensed professional, and what realistic costs look like. It is written for U.S. homes served by split-system central air, the most common configuration in single-family houses, where an outdoor condensing unit pairs with an indoor air handler or furnace coil.
How a central air conditioner is supposed to work
Before diagnosing anything, it helps to understand the parts and the cycle. Once you can name the components and describe what they do, most central air conditioner repair becomes a search for the component that has stepped out of its expected range.
- Thermostat: the wall control that calls for cooling by closing a circuit on the indoor unit when indoor temperature rises above the set point.
- Indoor air handler or furnace: the blower that pulls return air through the filter, across the evaporator coil, and pushes conditioned air into the duct system.
- Evaporator coil: the cold coil that absorbs heat from indoor air; refrigerant inside it evaporates from liquid to vapor.
- Condensing unit: the outdoor cabinet housing the compressor, condenser coil, and condenser fan motor.
- Compressor: the pump that circulates and pressurizes refrigerant.
- Condenser fan motor: pulls outdoor air across the condenser coil to reject heat.
- Reversing valve (heat pumps only): switches the system between heating and cooling modes.
- Expansion valve or metering device: drops refrigerant pressure before it enters the evaporator coil.
- Condensate drain: the PVC line that carries moisture from the evaporator coil to a floor drain or the outside.
- Refrigerant lines: insulated copper tubing that connects the indoor and outdoor units.
When you set the thermostat five degrees below room temperature, four things must happen in sequence for a central air conditioner repair conversation to even start: the indoor blower must start, the compressor must energize, the outdoor fan must run, and air must move through both coils. If any of those four steps fails, the symptoms differ, and the diagnosis narrows.
Safety and legal ground rules before any repair
Some repairs are perfectly legal and safe for a homeowner. Others are not, and the line is drawn by refrigerant, electricity, and local code.
- Refrigerant handling is regulated. Under U.S. law, the sale of refrigerants such as R-410A and R-32 is restricted to certified technicians, and intentional venting of refrigerant is prohibited. Homeowners cannot legally top off a system with store-bought refrigerant and call it a fix; that is a temporary patch and an environmental violation.
- Line-voltage work is dangerous. The outdoor unit is typically fed by a 240-volt branch circuit at 30 to 50 amps. Working inside the condensing unit cabinet, the disconnect, or the breaker panel requires respect for that voltage.
- Permits and code. Many jurisdictions require a permit for replacing an air handler, running new refrigerant lines, or replacing a condenser. A licensed HVAC contractor pulls those permits and arranges inspection.
- Warranty considerations. Most manufacturer warranties on compressors and coils are voided if the system is opened by anyone other than a licensed contractor. Check the warranty paperwork before you disconnect anything.
The practical rule of thumb: central air conditioner repair tasks that involve the sealed refrigerant system, the compressor, or the electrical panel are professional work. Filter, thermostat battery, condensate drain, and basic airflow tasks are homeowner work.
The first ten minutes: a homeowner triage checklist
Before calling for service, walk through this short checklist. A surprising number of central air conditioner repair calls are resolved in the first ten minutes with a free fix.
- Check the thermostat. Confirm it is set to Cool, the fan is set to Auto, and the temperature is at least 3°F below the current room temperature. Replace the batteries if the display is dim.
- Check the breaker. A tripped 240-volt breaker at the panel or a pulled disconnect at the outdoor unit will silence the compressor. Reset once. If it trips again, leave it off and call a technician.
- Listen at the outdoor unit. Within a minute of the thermostat calling for cooling, you should hear the compressor hum and the fan spin. If the fan runs but the compressor does not, the issue is electrical or capacitor-related.
- Feel the supply air. Within five minutes of startup, the air from a supply register should be 15 to 20°F cooler than the return air. If it is barely cool or warm, the system is running but not actually cooling.
- Inspect the filter. A clogged filter is the single most common cause of weak cooling. Replace it if you cannot see light through the media.
- Look at the condensate drain. If the indoor coil is freezing, you will see ice on the suction line at the air handler and water dripping where it should not be. A clogged condensate drain is a common trigger.
If those six checks pass and the system still misbehaves, it is time to move from triage to diagnosis.
Common symptoms and what they actually mean
Every central air conditioner repair job starts with a symptom. The table below maps the most common complaints to the parts that usually cause them, in roughly the order a technician would rule them out.
| Symptom | Likely cause (in order of probability) | Typical fix | Realistic cost range (parts + labor) |
|---|---|---|---|
| System blows warm air, indoor fan runs, outdoor unit silent | Tripped breaker, failed contactor, bad run capacitor, low-pressure safety open | Reset breaker, replace contactor, replace dual run capacitor, diagnose refrigerant pressure | $120-$650 |
| Outdoor fan runs, compressor does not start | Bad compressor, open start relay, low refrigerant pressure lockout | Replace start device, recover and recharge refrigerant, replace compressor | $180-$2,800 |
| Air feels barely cool, runs constantly | Dirty evaporator coil, low refrigerant charge, undersized return duct, failed metering device | Clean coil, leak-test and recharge, repair duct, replace TXV | $150-$1,400 |
| Ice on suction line or evaporator coil | Restricted airflow (filter, coil, blower), low refrigerant, failed metering device | Restore airflow, leak-test and recharge, replace metering device | $120-$1,100 |
| Short cycling (turns on and off every few minutes) | Oversized system, low refrigerant, high-head pressure, bad thermistor | Adjust charge, clean condenser coil, replace thermistor, verify load calculation | $140-$1,600 |
| Water leaking from indoor unit or ceiling | Clogged condensate drain, cracked drain pan, frozen coil that thawed | Clear drain, treat pan, install float switch, repair insulation | $90-$700 |
| High electric bill with normal comfort | Dirty condenser coil, weak capacitor, low charge, duct leakage, aging equipment | Clean coil, replace capacitor, seal ducts, evaluate replacement | $120-$7,000+ |
Costs are broad because the U.S. market varies widely by region and season. Use them as a sanity check during estimates, not as a quote. The next sections explain why each of those fixes works.
DIY repairs a homeowner can realistically do
There is a real category of central air conditioner repair that does not require a license, certification, or a manifold gauge set. These tasks are the ones worth doing before you pay a service dispatch fee.
Replacing the air filter
A clogged filter is the root cause of a long list of problems: frozen coils, weak cooling, high bills, and short cycling. The filter is usually at the return grille or at the air handler. Replace it every 30 to 90 days during the cooling season, more often if you have pets, construction dust, or allergies. Use the size printed on the existing filter; never oversize a slot with a folded filter that blocks airflow.
Clearing the condensate drain
The condensate drain is a thin PVC line, usually 3/4 inch, that runs from the indoor coil’s drain pan to a floor drain or to the outside. Algae and slime can plug it in a single season. Pour a cup of white vinegar into the access tee near the air handler once a quarter, or use a wet/dry vacuum at the outside end to pull the clog out. If water is dripping inside the house, the drain is almost always the first place to look.
Cleaning the outdoor condenser coil
The outdoor coil pulls in leaves, cottonwood seeds, grass clippings, and dust. A dirty condenser coil raises head pressure, makes the compressor work harder, and shortens equipment life. Turn off power at the disconnect, remove the top grille, and gently rinse the coil from the inside out with a garden hose. Do not use a pressure washer; it bends the fins. A fin comb can straighten bent fins.
Replacing thermostat batteries and checking settings
Modern thermostats lose their charge seasonally. A dying battery can cause the system to ignore calls for cooling, run the wrong schedule, or display a blank screen. Replace the batteries annually, ideally before the first heat wave. While you are at it, confirm the fan mode is set to Auto. A fan left in On runs continuously and can mask cooling problems while running up the bill.
Resetting a tripped breaker
A single breaker trip during a heat wave is often the system’s way of saying it is overloaded. Wait five minutes for the compressor to cool, reset the breaker firmly to Off and back to On, and watch the system. If it trips again the same day, leave it off. A breaker that trips twice in a row is protecting you from a hard fault such as a shorted compressor, a grounded motor, or a seized fan, and a licensed technician should look at it.
Repairs that belong with a licensed HVAC technician
Once you step inside the refrigerant system or the electrical controls, the work crosses into territory that requires training, certification, and insurance. A central air conditioner repair technician brings gauges, recovery equipment, a multimeter, a leak detector, and a knowledge of the local code. The homeowner benefits from that expertise because the system is expensive, and a wrong move can damage the compressor, the control board, or both.
Capacitor replacement
Run capacitors are small, cylindrical components that give the compressor and the fan motor the torque they need to start. They are also one of the most common parts to fail. A weak capacitor is the usual culprit when the outdoor fan spins slowly, hums without starting, or starts only after a hard thump to the cabinet. Capacitors are inexpensive, but the wrong microfarad rating or voltage can damage a motor, so the replacement is best left to a tech who can match the part to the unit.
Contactor replacement
The contactor is the relay that closes when the thermostat calls for cooling, sending line voltage to the compressor and fan motor. Its contacts pit and weld over years of cycling. A pitted contactor is usually the cause of an outdoor unit that hums but does nothing, or that works intermittently. Replacement is straightforward for a tech, less so for a homeowner who has not worked with 240-volt equipment.
Refrigerant leak detection and recharge
A central air conditioner is a sealed system; if refrigerant is low, it is leaking. Topping it off without finding the leak is like refilling a tire without finding the nail. A licensed technician will pressure-test the system, use an electronic leak detector or a soap-bubble solution, and recharge by weight with the correct refrigerant. The cost includes labor, the leak repair, the refrigerant itself, and the recovery of any old refrigerant that is vented.
Compressor replacement
A failed compressor is the single most expensive central air conditioner repair scenario. On a system under 10 years old, replacing the compressor is often worth it. On an older system with a tired coil, a weak blower, and rising electric bills, the money is usually better spent on a full replacement. A good technician will run the load calculation, check the air handler, and quote both options.
Evaporator and condenser coil replacement
Coil replacement is invasive: the indoor coil sits inside a plenum that has to be opened, the refrigerant recovered, and the new coil brazed in. Condenser coils can sometimes be replaced separately, but a new condenser coil and a new compressor on a 15-year-old system is rarely a good investment. These are jobs where the technician’s judgment about replacement versus repair matters as much as the mechanical skill.
Reading the symptoms: a diagnostic walkthrough
The fastest way to learn central air conditioner repair is to follow a real diagnosis from start to finish. Here is how a careful technician works through a no-cooling call.
Step 1: confirm the complaint at the thermostat
Set the thermostat to Cool, 5°F below room temperature, fan to Auto. Watch what happens. Note whether the indoor blower starts, whether the outdoor unit makes any noise, and how long the system runs before doing anything.
Step 2: check the supply and return temperatures
Hold a thermometer at the return grille and at a nearby supply register after the system has run for 10 minutes. The supply air should be 15 to 20°F cooler than the return. A 5°F split means the system is running but not actually cooling. A 0°F split means the evaporator coil is not getting cold refrigerant.
Step 3: inspect the indoor side
Open the air handler door or panel. Look for ice on the suction line, water in the drain pan, and obvious debris on the filter. A frozen coil has to thaw completely before any refrigerant reading is meaningful; running the system while frozen can damage the compressor.
Step 4: inspect the outdoor side
With the disconnect off, look at the condenser coil for dirt and damage. Look for oil stains at the refrigerant connections, a sign of a slow leak. Listen for the fan, then turn the power back on and watch the contactor close.
Step 5: take electrical and pressure readings
A technician will measure the line voltage, the compressor amp draw, and the high-side and low-side refrigerant pressures. Refrigerant pressures are compared to the manufacturer’s chart for the current outdoor temperature, not to generic values. A low-low and low-high with the compressor running usually means a low charge. A high-high and low-low usually means a restriction or a bad condenser fan motor.
Step 6: decide between repair and replacement
Once the diagnosis is in hand, the conversation turns to cost and value. The next two sections cover that conversation.
Repair versus replacement: how to decide
Not every central air conditioner repair makes financial sense. The decision depends on the age of the system, the cost of the fix, the condition of the components that are still working, and the expected efficiency of the replacement.
| Scenario | Repair usually makes sense when | Replacement usually makes sense when |
|---|---|---|
| Refrigerant leak | Leak is at a fitting, valve, or accessible coil, and the rest of the system is under 10 years old | Leak is in the evaporator coil buried in a plenum, system is 12+ years old, or coil and compressor are both marginal |
| Compressor failure | System is under warranty, indoor coil and blower are clean and quiet, ductwork is tight | System is 12+ years old, electric bill has been climbing, indoor coil has been cleaned multiple times |
| Capacitor or contactor | Almost always; these are wear items, not end-of-life signs | Never on their own, though they may be the last thing you replace before a full change-out |
| Recurring weak cooling | Cause is dirty coil, clogged drain, or minor duct leakage | Cause is a tired compressor combined with an undersized return duct, and the system is past 12 years |
| High bills, normal comfort | Duct sealing, coil cleaning, or a single part replacement restores efficiency | SEER rating is below modern standards, ducts are leaky and unreachable, equipment is past year 15 |
A simple rule of thumb used by many HVAC contractors is the 5,000 rule: multiply the age of the system in years by the cost of the repair in dollars. If the result is more than 5,000, replacement is usually the better long-term value. If it is less, repair is the right call. It is not a law, but it is a useful sanity check.
Cost factors and what drives them
The price of central air conditioner repair is set by a few predictable inputs. Knowing them helps a homeowner push back on vague line items.
- Diagnostic fee: most contractors charge a flat trip-and-diagnose fee, often credited against the repair if you proceed. In the U.S. this typically runs $80 to $200, with higher rates in metro areas and during peak cooling season.
- Parts: capacitors and contactors are cheap; compressors, coils, and blower assemblies are not. Aftermarket parts cost less than OEM, with a trade-off in warranty.
- Labor hours: a capacitor swap is a one-hour job; a compressor replacement is a half-day job that includes recovery, brazing, evacuation, and recharge.
- Refrigerant: R-410A prices have risen as the industry transitions to lower-global-warming-potential refrigerants. Per-pound cost varies seasonally and by region.
- Permits and code: some jurisdictions require a permit for line-set changes or new electrical circuits. The contractor usually handles this and passes the cost through.
- Seasonal demand: the first 90°F weekend in July produces a flood of calls, and overtime rates appear. Scheduling service in spring or fall is usually cheaper and faster.
Preventive maintenance that actually prevents repairs
Most central air conditioner repair calls share a common cause: neglect. A short annual maintenance visit catches the small problems before they become big ones.
- Spring tune-up: clean the condenser coil, inspect the contactor, test the capacitor, measure refrigerant pressures, check the condensate drain, and confirm the temperature split.
- Filter discipline: a fresh filter every 30 to 90 days. Keep a few spares on hand so there is no excuse.
- Annual drain treatment: pour a cup of white vinegar or a commercial drain tablet into the condensate line every spring.
- Clearance around the outdoor unit: keep two feet of clearance on all sides and five feet above. Trim shrubs, pull weeds, and remove stored items.
- Check the duct connections: at the air handler, at the plenum, and at each register boot. Mastic sealant or aluminum tape outperforms screws and ordinary duct tape.
- Run the system monthly: even in the off-season, run the system in Cool for ten minutes once a month. Long idle periods dry the lubricant in the compressor oil and oxidize electrical contacts.
A good maintenance visit costs less than a single emergency service call, and the record of annual service strengthens any warranty claim if the compressor fails early.
How to choose a repair contractor
The technician you hire shapes the central air conditioner repair experience as much as the part that failed. A few practical checks help separate the pros from the rest.
- License and insurance: ask for the state HVAC contractor license number and proof of liability and workers’ compensation insurance. Verify both.
- EPA Section 608 certification: required for any technician who opens the refrigerant system. The certificate should be current.
- Written estimates: a written scope that names the parts, the labor, the warranty, and the total. Verbal quotes are not enough.
- References and reviews: ask for two recent local references and check third-party review sites. Look for patterns, not single complaints.
- Diagnostic discipline: a good technician will measure before they replace. If a contractor quotes a compressor without measuring pressures, get a second opinion.
- Warranty terms: ask for the warranty on parts and on labor, in writing. Manufacturer part warranties are often longer than the contractor’s labor warranty.
Trust your senses. A clean truck, organized paperwork, shoe covers in the home, and a clear explanation of the problem are signals of a professional operation. So is the willingness to walk through the estimate line by line.
Common mistakes homeowners make during a repair
Some of the costliest central air conditioner repair jobs are made worse by well-intentioned actions. Avoiding these mistakes protects both the system and the wallet.
- Adding refrigerant without finding the leak: a slow leak will return, often within a season, and each recharge is a charge for labor and refrigerant.
- Replacing the compressor without addressing the cause: burned-out motors often leave debris in the system, and a new compressor on a dirty system fails early.
- Running the system with a frozen coil: the ice insulates the evaporator and forces the compressor to pump against a higher load. Thaw first, then diagnose.
- Ignoring duct leakage: a perfectly tuned system attached to leaky ducts will still cost more to run and still struggle to cool the upstairs.
- Skipping permits: unpermitted electrical or refrigerant work can complicate a home sale, void an insurance claim, and create a safety hazard.
- Trusting price alone: the lowest bid is sometimes the highest cost when shortcuts are taken. Compare scopes, not totals.
Seasonal and regional considerations
Where and when a central air conditioner repair happens changes the work. A few regional notes worth keeping in mind.
- Humid climates (Gulf Coast, Southeast): expect more condensate drain issues, more algae growth, and faster coil fouling. Quarterly drain treatment is not optional.
- Dusty climates (Southwest, High Plains): condenser coils clog faster, filters load faster, and duct leakage pulls dust into the return side. Seal the ducts and check filters monthly.
- Coastal climates: salt air corrodes condensing unit cabinets, contactors, and refrigerant line insulation. Annual rinsing with fresh water and a sacrificial anode on the pad extends life.
- Cold-winter climates: heat pumps rather than straight cool-only systems are common, and the repair picture changes. A reversing valve or a defrost-cycle issue can look like a cooling problem.
- Heat waves: during the first heat event of the season, systems that sat idle for nine months fail in clusters. Schedule a spring tune-up in March or April, before the rush.
When the right answer is replacement, not repair
There is a moment in every aging central air conditioner when a central air conditioner repair is no longer the right answer. That moment is usually the third or fourth major service in three years, especially when each fix is more expensive than the last.
A modern replacement buys more than a new compressor. It typically includes a higher SEER2 rating, a variable-speed blower that dehumidifies better, a smarter thermostat, and warranty coverage on the entire system for ten years or more. For households in regions with strong utility rebates, the net cost of a new system is often close to the cost of two or three major repairs.
If you are at that point, ask the contractor for a load calculation based on Manual J or an equivalent method, not a simple “same size as before” quote. Many older systems were oversized, and replacing an oversized unit with another oversized unit just moves the problem of short cycling, poor dehumidification, and wasted energy to the new equipment.
What a good service call looks like from start to finish
Setting expectations for the visit helps a homeowner judge the quality of the work. A well-run central air conditioner repair appointment has a predictable shape.
- Arrival and walkthrough: the technician arrives within the agreed window, asks about the symptom, and inspects both the thermostat and the equipment.
- Diagnosis: the tech measures voltage, amperage, and pressure, and explains the finding in plain language. The price of the diagnostic is quoted up front.
- Estimate: a written estimate lists the failed part, the recommended fix, alternate options if any, and the warranty on parts and labor.
- Approval: the technician waits for approval before installing parts. No work proceeds without a yes from the homeowner.
- Repair: the failed part is replaced, the system is tested under load, and the temperature split is verified.
- Documentation: the technician leaves a written invoice with the part numbers, the test results, the warranty terms, and any recommendations for the future.
That flow is a target, not a guarantee. But if a service call veers sharply from it, the homeowner has reason to ask questions.
Putting it together: a practical repair roadmap
The most useful answer to a central air conditioner repair question is a process, not a single tip. The roadmap below condenses the article into five moves.
- Triage the symptom with the ten-minute homeowner checklist before scheduling anything.
- Decide DIY versus professional using the line between airflow and refrigerant work.
- Document the symptoms: when it started, what the thermostat says, what the system does, and what has changed since last season.
- Schedule a technician for the diagnosis and a written estimate, ideally in shoulder season.
- Use the estimate to weigh repair against replacement, with the 5,000 rule and a clear view of the system’s age and condition.
Following those five moves turns a stressful loss of cooling into a structured decision, and a structured decision is almost always a cheaper and better outcome than a panicked call to the first contractor in a search result.
Frequently asked questions
How much does central air conditioner repair usually cost?
Most service calls for central air conditioner repair in the U.S. fall between $150 and $650 for common fixes such as capacitors, contactors, condensate drain clearing, and minor refrigerant top-offs after a leak repair. Replacing a compressor or an evaporator coil can run $1,500 to $3,500. Costs vary by region, season, and the condition of the system.
Can I repair my central air conditioner myself?
Homeowners can safely handle filter changes, thermostat battery swaps, condensate drain clearing, and gentle condenser coil rinsing. Any work that involves the sealed refrigerant system, the compressor, the contactor, or the 240-volt electrical feed is best left to a licensed HVAC technician. Refrigerant work in particular is restricted to EPA-certified technicians under U.S. law.
Why is my central air conditioner running but not cooling?
The most common causes are a clogged air filter, a dirty evaporator coil, low refrigerant charge, a failed metering device, or a bad capacitor on the outdoor unit. Start by replacing the filter and clearing the condensate drain. If the system still does not cool, schedule a technician to measure pressures and inspect the compressor circuit.
How long should a central air conditioner last?
A well-maintained split system in the U.S. typically lasts 15 to 20 years. Coastal, dusty, and high-usage environments shorten that range; mild climates and disciplined maintenance extend it. Annual service, frequent filter changes, and clean coils are the biggest factors in pushing a system toward the upper end of its life.
What is the difference between R-22 and R-410A refrigerant?
R-22 (often sold as Freon) is an older hydrochlorofluorocarbon refrigerant that has been phased out of new equipment in the U.S. because of its ozone-depletion potential. R-410A is the current standard for residential systems. A system built for R-22 cannot be topped off with R-410A; the oils, pressures, and components are not interchangeable.
Is it worth repairing a 15-year-old central air conditioner?
It depends on the part that failed. Replacing a capacitor, contactor, or thermostat on a 15-year-old unit is usually worthwhile. Replacing the compressor or the coil is often not, because the rest of the system is near end of life and the new part will inherit its weaknesses. Use the 5,000 rule and ask the contractor to quote both repair and replacement.
How often should I schedule central air conditioner maintenance?
Once a year, ideally in early spring before the cooling season begins. In dusty or coastal environments, a second visit in mid-summer is a smart investment. A maintenance visit typically includes coil cleaning, electrical checks, refrigerant pressure readings, drain clearing, and a temperature split test.
Why does my air conditioner make a buzzing or humming noise?
A steady hum from the outdoor unit often points to a failing run capacitor or a contactor that is not closing fully. A buzz from the indoor unit may indicate a frozen evaporator coil or a blower motor that is about to fail. Turn the system off, check the filter, and schedule a technician if the noise returns or is accompanied by a loss of cooling.
Can a central air conditioner leak refrigerant without a visible sign?
Yes. Slow refrigerant leaks can persist for years, slowly reducing cooling capacity and efficiency without an obvious oil stain or hiss. Symptoms include gradually rising electric bills, longer run times, and ice on the suction line. A leak detection visit with an electronic sniffer and a pressure test is the only reliable way to find a slow leak.
What should I do if my air conditioner trips the breaker repeatedly?
Reset the breaker once after the compressor has cooled for five to ten minutes. If it trips again the same day, leave the breaker off and call a licensed technician. Repeated trips usually mean a hard electrical fault such as a shorted compressor winding, a seized fan motor, or a grounded contactor, all of which can damage equipment if the system keeps trying to start.

Leave a Reply