

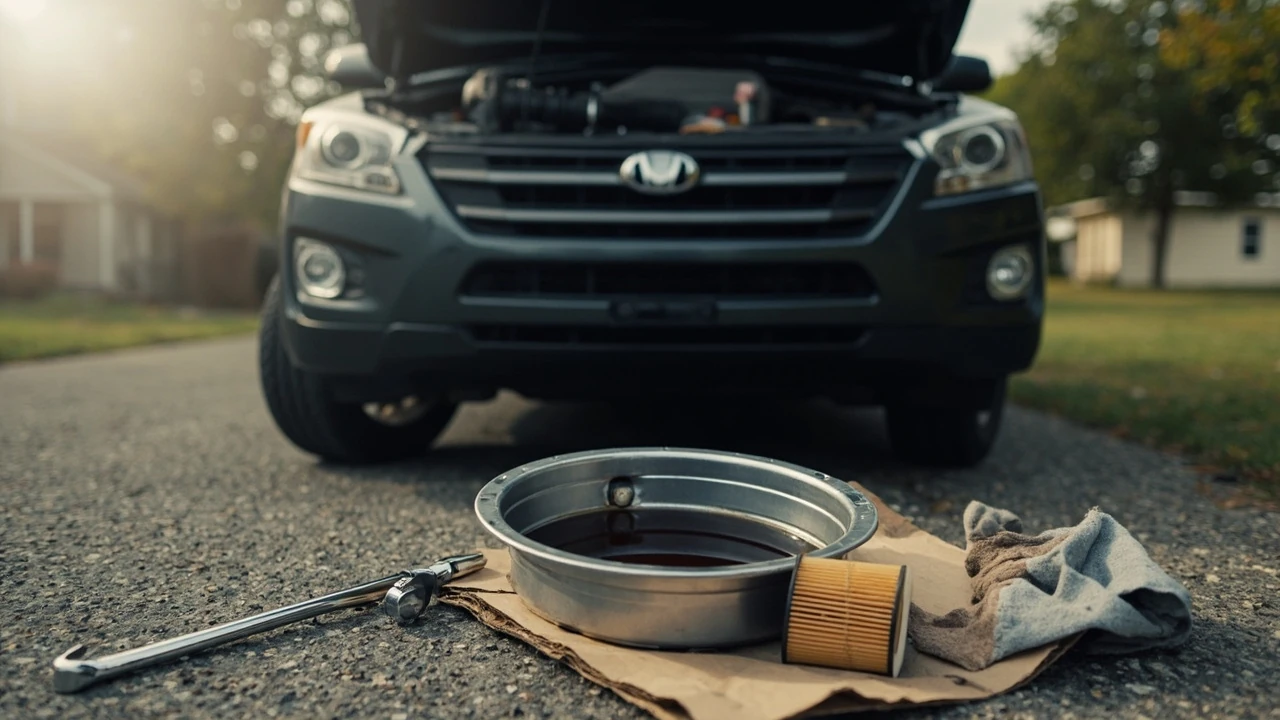
0il change at home: what to know before you turn the first wrench
A warm engine, a level driveway, a drain pan, and a small set of hand tools are usually all it takes to do a routine 0il change at home. Most U.S. drivers finish the job in 30 to 60 minutes once the area is set up, and the savings over a quick-lube visit show up after a year of two services. Warming the engine, draining the old oil fully, swapping the filter, refilling to the correct level, and checking for leaks before normal driving is the basic rhythm.
This guide walks through what actually happens during a 0il change, why the service interval matters, what to buy ahead of time, and the safe step-by-step sequence most home mechanics follow. It is written for U.S. homeowners and DIYers who want a clean, predictable result without paying for shop labor they can reasonably provide themselves.
What an oil change actually does for an engine
Engine oil has three jobs that quietly decide how long a powertrain lasts. It forms a hydrodynamic film between moving parts, pulls heat away from bearings and pistons, and carries combustion byproducts and wear metal to the filter. Over time, the additive package that supports those jobs is consumed, and the oil itself becomes loaded with soot, moisture, fuel dilution, and microscopic metal particles that the filter cannot catch.
A 0il change therefore does four things at once. It replaces degraded base oil with fresh lubricant, restores the additive package, removes the suspended solids and combustion acids that have built up, and swaps a filter that has reached the limit of its dirt-holding capacity. Skipping any one of those steps shortens the useful life of the other three.
How often a 0il change is really needed
Older 3,000-mile intervals still pass along as folk wisdom, but most modern vehicles sealed for a 5W-30 or 0W-20 synthetic are designed to run 7,500 to 10,000 miles between changes. Some full-synthetic setups stretch that further when paired with a long-life filter and an oil-life monitor. The right answer is in the owner’s manual, not in a generic rule of thumb.
A few conditions shorten the practical interval for any driver:
- Severe service as defined in the manual, which covers short trips under 10 minutes, towing, idling in traffic, and ambient temperatures above 90 °F or below 0 °F.
- Dusty environments such as gravel roads, construction zones, or farm work that overwhelm the air filter faster than usual.
- Stop-and-go commuting with extended idling, where fuel can wash into the oil and dilute it.
- Performance driving that runs the oil closer to its thermal limits and accelerates additive depletion.
A simple log of date, mileage, oil grade, and filter brand is more useful than any marketing claim. After two or three changes under your actual conditions, a pattern usually emerges and the schedule can be adjusted with some confidence.
What you need before you start a home 0il change
Lining everything up before the car is lifted pays off. A mid-job trip to the parts store is how most messes happen. The list below covers what a typical homeowner needs for a passenger car or light truck on a level driveway.
| Item | Why it matters | Notes for first-timers |
|---|---|---|
| Engine oil, correct grade and capacity | Volume is set by the manufacturer; the wrong viscosity can trigger a check-engine light or reduced protection. | Common U.S. specs: 0W-20, 5W-20, 5W-30, 0W-30. Synthetic blends and full synthetics are both acceptable when the manual allows them. |
| Oil filter matched to the engine | Wrong thread pitch or seal diameter can cause a slow leak that is hard to spot on a warm engine. | Use the manufacturer’s cross-reference; do not assume a visually similar filter fits. |
| Drain pan with enough capacity | Most four-cylinder engines hold about 4 to 5 quarts; a V6 or V8 can hold 6 to 8 quarts including the filter. | A wide, low-profile pan is easier to slide under the car without spilling. |
| Wrench or socket for the drain plug | Common sizes are 13 mm, 14 mm, 15 mm, and 17 mm, but some engines use a 3/8 inch square drive. | A six-point socket is safer than a twelve-point socket for avoiding a rounded plug. |
| Oil filter wrench | Some filters are hand-tight, others require a band, claw, or cap-style tool. | Cap-style tools that fit over the filter housing are gentler on the engine and reduce the risk of crushing a spin-on filter. |
| New drain plug gasket or crush washer | Reusing a flattened washer is the most common cause of a post-service drip. | Many cars use a one-time copper or aluminum washer that should be replaced every time the plug comes out. |
| Funnel, shop rags, nitrile gloves, and a plastic bag | Containment keeps the driveway clean and the used oil out of stormwater drains. | A large zip-top bag works well for trapping the old filter for transport. |
| Jack and jack stands or a low-profile ramp | Working under a car supported only by a hydraulic jack is unsafe. | Ramps are simpler for most sedans and crossovers; trucks and SUVs often need stands for the extra clearance. |
A few practical extras help. A piece of cardboard laid under the drain area catches drips that would otherwise stain concrete. A small LED work light is useful if the drain plug faces the back of the engine bay. A simple oil-change sticker or a note in a service log keeps track of the next interval.
Choosing the right oil and filter for your vehicle
Manufacturer specifications are the starting point. The owner’s manual lists a viscosity grade such as 5W-30 and an API or ILSAC performance category such as SP or GF-6. Those two ratings describe the additive package and the high-temperature protection the engine was designed around, and deviating from them offers no benefit and can void warranty coverage on a newer car.
Once the spec is fixed, the choice between conventional, synthetic blend, and full synthetic is a matter of budget and conditions. Full synthetics handle extreme temperatures better and resist breakdown longer, which is why many manufacturers require them. Conventional oil is cheaper and adequate for older engines driven gently, though it usually demands a shorter interval.
As a Machinery Lubrication overview of professional oil change practice explains, the main reason to change engine oil and the filter on schedule is to extend engine life by removing contaminants before they accelerate wear. Combustion gases slip past the piston rings on every power stroke, and airborne grit that escapes a tired air filter adds to the load. Modern refining and additive chemistry have lengthened drain intervals, but they have not removed the need for periodic service.
Filters follow a similar pattern, and the cheapest option is rarely the best value. A quality filter uses a silicone anti-drainback valve to keep oil over the pick-up when the engine sits overnight, a heavier steel can to resist crushing, and a synthetic media that holds more dirt before pressure rises. For most U.S. drivers, mid-tier filters from a known brand deliver a noticeable step up in protection without the price of a premium racing unit.
Safety and environmental basics for a home 0il change
Used engine oil is classified as a hazardous waste in most U.S. states and must not be poured onto the ground, into a storm drain, or into household trash. Most auto parts stores, quick-lube shops, and municipal household hazardous waste programs accept used oil and used filters at no charge. A clean gallon jug with a screw cap is the simplest transport container.
A few habits also matter before any work begins:
- Park on a level, sealed surface. A sloped driveway makes the drain plug face unpredictable and the dipstick reading inaccurate.
- Engage the parking brake, chock the opposite wheels, and place the transmission in park or in gear for a manual.
- Let the engine warm up for 5 to 10 minutes so the oil drains faster, then shut it off and wait a few minutes before going underneath. Hot oil burns skin.
- Wear nitrile gloves and old clothes. Used oil clings to fabric and is hard to wash out completely.
- Keep a fire extinguisher within reach when working near fuel system components, and avoid open flames or smoking in the work area.
Step-by-step: how to do a clean home 0il change
The exact order varies slightly between a transverse V6 and a longitudinal inline engine, but the sequence below is the one most home mechanics follow.
- Warm the engine for 5 to 10 minutes, then shut it off and let it rest for a few minutes so the oil settles in the pan.
- Lift the vehicle with a jack and secure it on stands, or drive it up ramps. Confirm the car is stable before going underneath.
- Place the drain pan under the oil pan and position it so the stream will hit the center of the pan, not the wall.
- Loosen the drain plug with the correct socket, turning counterclockwise. Keep one hand on the wrench and the other on the plug so it does not fall into the pan when it breaks free.
- Allow the oil to drain for at least 10 minutes. Tilting the drain pan slightly toward the plug hole helps the last of the oil run out.
- Move the pan under the oil filter. Spin the filter off by hand, or use a filter wrench if it is stuck. Hold it upright as it comes free to keep residual oil off the engine and your arm.
- Compare the old filter gasket to the new one to make sure the old gasket is not stuck to the engine block. A forgotten gasket is a guaranteed leak.
- Wipe the filter mounting surface clean, dip a clean finger in the new oil, and lubricate the new filter’s rubber gasket with a thin film.
- Install the new filter hand-tight plus about three-quarters of a turn. Over-tightening distorts the gasket and causes a leak.
- Install a new drain plug gasket on the plug, thread it in by hand to avoid cross-threading, then torque it to the spec in the manual. Snug is usually enough; a six-point socket is safer than a long breaker bar.
- Lower the vehicle, remove the oil filler cap, and pour in roughly 80 percent of the listed capacity using a funnel.
- Check the dipstick, top off to the full mark with the remaining oil, and reinstall the filler cap.
- Start the engine and let it idle for about 30 seconds. Watch the drain plug and filter for leaks while the engine is running.
- Shut the engine off, wait a couple of minutes, and recheck the dipstick. Top off only if the level is below the full mark.
- Reset the oil-life monitor according to the owner’s manual, log the mileage, and dispose of the used oil and filter properly.
A calm, deliberate pace is more useful than speed. Most of the common mistakes happen in the last few percent of the job, when a tired DIYer is rushing to button everything up.
Common problems and how to avoid them
Even a careful 0il change can go wrong in recognizable ways. The table below summarizes the symptoms, the usual cause, and the simplest fix.
| Symptom | Likely cause | What to do |
|---|---|---|
| Drip from the drain plug after a short drive | Old crush washer or a plug that is under- or over-torqued | Lower the car, remove the plug, install a new washer, and torque to the manual’s spec. |
| Oil film around the base of the filter | Old gasket stuck to the block, or the new gasket is pinched | Remove the filter, confirm only one gasket is present, lubricate the new one, and reinstall. |
| Engine sounds rough and the oil light flickers at idle | Low oil level after the refill, or a wrong viscosity grade | Recheck the dipstick on level ground and add the correct oil to the full mark. |
| Excess smoke from the tailpipe on the first start | Residual oil spilled on the exhaust manifold or downpipe | Let the engine run for a few minutes; the smoke should clear once the oil burns off. |
| Oil level reads high after a few hundred miles | Fuel dilution from short trips or a small head-gasket leak | Monitor level weekly. If the level keeps rising, have a shop check for coolant or fuel contamination. |
Most issues are caught during the post-fill idle. Sitting in the driver’s seat with the engine running, watching the oil light, and scanning the underside of the engine for fresh drips takes only a minute and is the cheapest insurance available.
Disposing of used oil and filters the right way
One 0il change produces four to eight quarts of used oil and one soiled filter. Both are recyclable. Used oil can be re-refined into base stock for new lubricants, and used filters are processed for their steel content once the oil is drained from them. The disposal chain is straightforward:
- Drain the used oil from the filter into the drain pan for about an hour, then puncture the filter’s dome and let the rest drain into the pan.
- Pour the used oil into a clean, sealed container. Original oil bottles with their caps work well, as do dedicated oil-drain jugs sold at parts stores.
- Take the sealed oil and the drained filter to a local auto parts store, service station, or municipal collection site. Most accept them at no charge.
- Wipe up any drips on the driveway with absorbent material, bag it, and dispose of it with the used oil so it does not end up in storm runoff.
Keeping the receipt or a note of the date and volume supports household hazardous waste reporting in some counties and helps track how often a 0il change is actually being performed.
When a home 0il change is not the right choice
Doing the work yourself is satisfying and inexpensive, but a few situations are better left to a shop. New vehicles under warranty sometimes require dealer service to keep coverage intact, especially if a free maintenance plan is included. Hybrid and plug-in powertrains often have coolant loops and oil specifications that need special equipment. All-wheel-drive and four-wheel-drive vehicles can sit low and require extra clearance that a home ramp cannot safely provide.
Engines with known oil-consumption issues, cars that sit unused for long periods, and any vehicle showing a low oil level between changes deserve a closer look than a routine service. In those cases, a professional pressure test, scan-tool read, and used-oil analysis usually cost less than the long-term damage of running a compromised engine.
Frequently asked questions
How long does a typical home 0il change take?
For a first-time DIYer on a passenger car, plan on 45 to 90 minutes including setup and cleanup. A second or third change on the same vehicle usually takes 30 to 45 minutes. The drain itself is 10 to 15 minutes, and the rest is jacking, tool gathering, and the careful post-fill inspection.
What is the best time of year to do a 0il change?
There is no single best season, but mild weather is easier on the DIYer. Cold oil drains more slowly and is thicker to handle, and summer heat makes the working environment and the spent oil uncomfortable. Spring and fall in most U.S. regions offer comfortable temperatures and let the car run through a full season of typical driving before the next service.
Do I really need to change the filter every time?
Yes, for almost all passenger vehicles. The filter is rated to hold a specific amount of contamination, and that capacity is sized around a normal drain interval. Skipping the filter lets the old media load up with debris and bypass contaminants back into the engine.
Can I switch between conventional and synthetic oil between 0il changes?
Modern engines are designed to tolerate either, and a single switch rarely causes problems. The owner’s manual is still the source of truth, though, because some manufacturers require synthetic oil to meet fuel-economy or emissions targets. Mixing brands of the same spec is also fine.
What is the most common mistake during a home 0il change?
Forgetting the old filter gasket on the engine block is the classic one. The new filter then has two gaskets, the upper one never seats, and the engine leaks. A quick swipe of the mounting surface before installing the new filter prevents it.
Is a 0il change cheaper than taking the car to a shop?
For a typical passenger car, doing the work at home costs roughly half of a quick-lube visit once the basic tools are owned. A starter set of ramps, a drain pan, a torque wrench, and a filter tool runs about the price of three or four shop visits, and the savings accumulate from there.
How do I know the correct oil capacity for my engine?
The owner’s manual lists the capacity in quarts and liters, including the amount that remains in the filter. After a 0il change, the dipstick is the final source of truth. Start with about 80 percent of the listed capacity, add the rest in small amounts, and stop at the full mark once the engine has been briefly run and shut off.
Should I follow the oil-life monitor or the mileage schedule?
The oil-life monitor on most modern cars is calibrated for typical driving and the manufacturer’s recommended oil. When most of the driving is short trips, towing, or extreme temperatures, shorten the interval manually. For mixed highway and suburban use, the monitor is a reliable guide.
Can a 0il change affect my car’s warranty?
Documenting each service with a dated receipt, mileage, oil grade, and filter brand protects the warranty. Skipping a service or using an unapproved spec is what causes warranty disputes, not who performed the work. A simple log book is enough evidence for most manufacturers.
What other home maintenance tasks pair well with a 0il change?
Checking tire pressure, inspecting the air filter, topping off washer fluid, and looking over the wiper blades are all quick and benefit from the same driveway setup. A seasonal habit of pairing a 0il change with a broader inspection keeps a car in good shape between professional visits.

Leave a Reply