

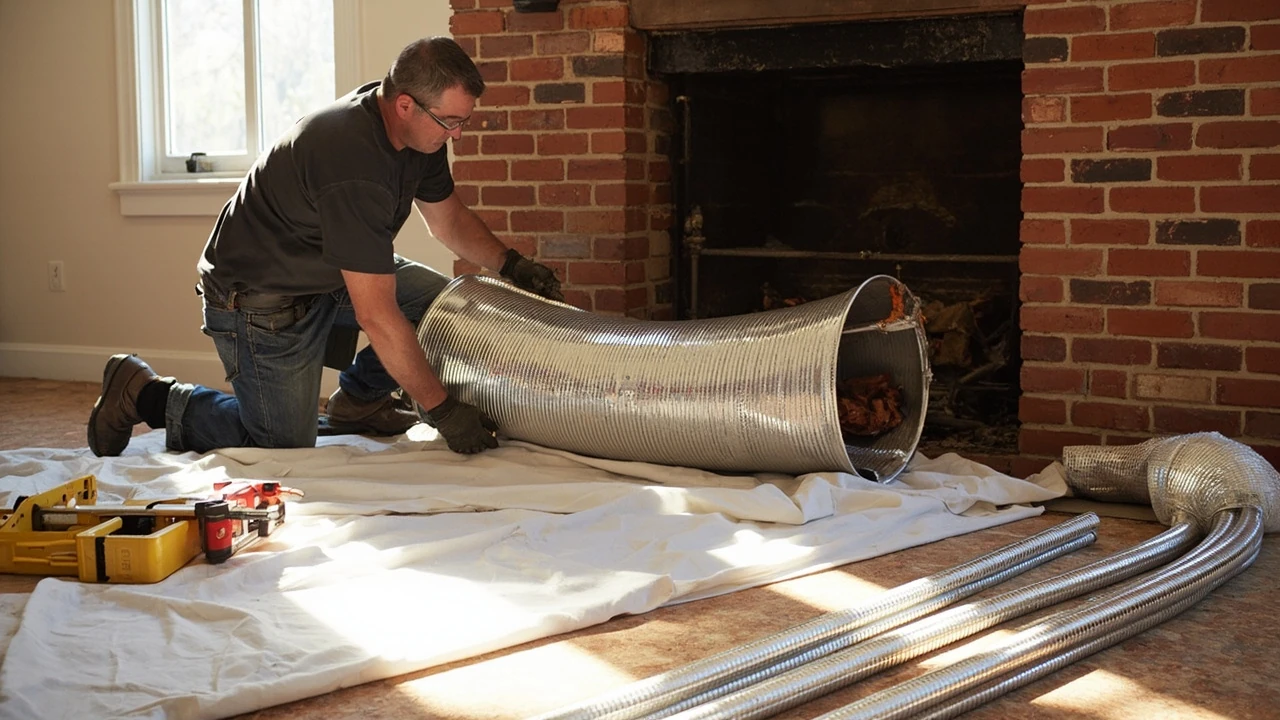
Chimney liner installation: what it really involves and when you need it
A fireplace with cracked flue tiles, a wood stove that was added without resizing the flue, or a chimney with no liner at all all point to the same fix: chimney liner installation. The liner is the inner channel that carries combustion gases out of the appliance, up the chimney, and safely above the roof. When that channel is missing, undersized, or damaged, the risk of creosote buildup, carbon monoxide leakage, and damage to the surrounding masonry increases sharply.
This guide walks through what a chimney liner actually does, the situations that genuinely require one, the material options a homeowner will be quoted, sizing basics, code and inspection considerations, and what a professional installation looks like from start to finish. It is written for U.S. homeowners dealing with a wood-burning fireplace, a wood stove, or a gas insert who want to understand the work before they sign a contract.
What a chimney liner does
A chimney liner is a continuous, heat-resistant channel inside the chimney that contains the products of combustion and vents them outside. According to the overview of chimney liners on Wikipedia, the liner acts as a protective barrier between the hot flue gases and the surrounding brick or masonry, and it is treated as the most operational part of a fireplace because it controls drafting, heat transfer, and moisture exposure.
Three functions are worth keeping in mind:
- Containment. Combustion gases include carbon monoxide, water vapor, and acidic condensates. A sound liner keeps those products inside the flue and out of the home’s structure.
- Thermal protection. The liner keeps the chimney walls cooler on the outside and reduces the risk of heat transferring to nearby framing, ceilings, or attic spaces.
- Sizing. A correctly sized flue matches the appliance it serves. Undersized flues produce poor draft; oversized flues let flue gases cool too quickly, which causes creosote to condense on the walls.
When chimney liner installation is genuinely required
Not every chimney needs a new liner. The cases that usually justify the work fall into a few clear patterns.
Relining an unlined masonry chimney
Some older masonry chimneys were built without a flue tile or other inner liner. Current residential building guidance in many jurisdictions requires a liner for any chimney serving a solid-fuel or gas appliance, so an unlined chimney typically has to be relined before the appliance is put back into service.
Replacing a damaged clay tile liner
Clay tile liners crack with age, chimney fires, and freeze-thaw cycles. A cracked tile is not something a homeowner can patch from the inside. Once tiles are spalling or shards are falling into the firebox, a stainless steel liner or a poured-in-place liner is the standard fix.
Resizing for a new appliance
This is the most common reason homeowners in the U.S. install a new liner today. Adding a wood stove, switching from an open fireplace to an insert, or installing a gas appliance changes the flue size requirement. A flue that was sized for an open fireplace is often too large for a tight-sealing stove, which causes drafting problems and heavy creosote deposition.
After a chimney fire
A chimney fire damages the flue from the inside out. Even if the masonry looks intact from the rooftop, the heat often cracks clay tiles and opens mortar joints. Insurers and code inspectors will routinely require a reline before a system is put back into use.
Types of chimney liners
Homeowners are usually choosing among three categories. Each has a different installation method, a different price band, and a different use case.
Stainless steel liners
Stainless steel is the most common choice for retrofit chimney liner installation. The liner arrives as a flexible corrugated tube or a rigid pipe, and it is lowered or pushed down through the existing flue. Flexible liners handle offsets and older chimneys with bends; rigid pipe is used for straight runs and gives a slightly better draft.
Stainless steel liners are paired with an insulation wrap, which is required by manufacturers and by most code bodies for solid-fuel applications. The insulation keeps flue gases warm, reduces creosote formation, and protects the surrounding masonry from heat during a chimney fire.
Aluminum liners
Aluminum is lighter and cheaper than stainless, but it is only rated for certain low-temperature gas appliances. It cannot be used with wood or with high-temperature gas equipment. For a wood stove or fireplace, aluminum is not a substitute.
Cast-in-place and poured liners
A poured-in-place liner is a cementitious or refractory mix cast around a temporary inflatable bladder inside the existing flue. Once cured, the result is a smooth, insulated, seamless flue. This method is often used when the existing chimney has heavy mortar damage and needs structural reinforcement in addition to a new flue surface.
Clay tile liners
New clay tile liners are mostly used in new masonry chimney construction, not in retrofit relining. Tile is hard to install inside an existing chimney without dismantling the structure, and a damaged tile liner is usually replaced with stainless rather than with new tile.
Comparing the main liner options
The table below summarizes the most important trade-offs. For additional context, Prices vary by region and chimney height; the ranges below are typical for a single-story U.S. home in 2026 and are intended for orientation, not as a quote.
| Liner type | Typical use | Approx. installed cost (whole system) | Lifespan | Key limitation |
|---|---|---|---|---|
| Flexible stainless (316L) | Wood stove, fireplace reline, most retrofits | $1,800 – $4,500 | 15 – 25+ years | Requires careful sizing and insulation |
| Rigid stainless (304 or 316L) | Straight masonry chimneys, some inserts | $2,000 – $5,000 | 20 – 30+ years | Cannot navigate offsets |
| Aluminum | Mid-efficiency gas appliances only | $600 – $1,500 | 10 – 15 years | Not rated for wood or high-heat gas |
| Cast-in-place / poured | Severely damaged masonry, structural rebuild | $3,500 – $8,000+ | 30+ years | Higher cost and longer cure time |
| New clay tile | New chimney construction | $4,000 – $9,000+ (with chimney build) | 30 – 50+ years | Not used for retrofit relining |
How a chimney liner is sized
Sizing is the step that most affects whether a wood stove actually drafts well, and it is the step contractors most often shortcut. The goal is to match the cross-sectional area of the flue to the appliance it serves, not to match the size of the existing chimney.
- Identify the appliance. The manufacturer’s installation manual lists the required flue area and the minimum flue diameter, typically in square inches or in inches of round diameter.
- Measure the existing flue. The installer measures the height, the cross-section (round versus rectangular), and any offsets.
- Apply the manufacturer’s chart. Most wood stove and insert manuals include a chart that maps stove output (BTU/hr) and flue height to flue area.
- Round down when oversizing. If the appliance allows either a 6-inch or an 8-inch flue, a smaller correctly sized flue usually drafts better than a larger one.
- Account for the connector pipe. The first section of stovepipe from the appliance to the liner is part of the system, and its diameter must match the liner.
If two appliances share a flue, the flue must be sized for the larger of the two, and a separate liner is generally required for each appliance. Sharing a flue between a wood stove and a gas furnace, for example, is not standard practice in residential work.
Code, inspection, and insurance basics
In the United States, residential chimney work is governed by a layered set of rules. The exact code depends on jurisdiction, but the same documents come up everywhere.
- NFPA 211. The National Fire Protection Association’s standard for chimneys, fireplaces, vents, and solid fuel-burning appliances. NFPA 211 is the reference document most inspectors and certified chimney sweeps work from.
- IRC Chapter 10 and 18. The International Residential Code covers chimney construction, factory-built fireplace listing, and clearances to combustibles.
- Manufacturer’s instructions. A listed liner must be installed to the manufacturer’s specifications to keep its listing and warranty valid.
- Local amendments. Some states and municipalities adopt older code editions or add stricter rules for wood smoke, including requirements for EPA-certified appliances and seasonal burn restrictions.
For an existing home, the key point is that a permit and an inspection are usually required when a new liner is installed, when an appliance is changed, or when a flue is resized. Skipping the permit can create problems at the next home sale and can give an insurer a reason to deny a fire claim.
What professional chimney liner installation looks like
The work itself is straightforward in concept but physical in execution. A typical install takes half a day to a full day for a one-story home with a straight chimney; taller or offset chimneys run longer.
- Inspection first. A Level 2 chimney inspection with a camera is done before any relining. The sweep confirms the flue condition, measures the run, and identifies offsets and clearances.
- Clean the flue. Heavy creosote, debris, and loose mortar are removed. The new liner goes into a clean flue, not a flue full of soot.
- Set up the top and bottom.
- At the top, the chimney crown or a top plate is opened enough to lower the liner.
- At the bottom, a cleanout or a tee connector is fitted so the liner can be attached to the appliance.
- Lower the liner. The flexible stainless tube is fed down from the top. A pulling cone or a weight on a rope is sometimes used to pull it through tight spots.
- Insulate the liner. A blanket of ceramic or mineral wool insulation is wrapped around the liner and held in place with mesh. Insulation is required by most manufacturers for solid-fuel systems.
- Connect and secure. The tee at the bottom is connected to the stovepipe, the top is finished with a rain cap and a top plate, and the system is mechanically fastened so it cannot move.
- Inspect and document. The completed liner is inspected, the permit is closed out, and the installer leaves a written record of the liner type, diameter, insulation R-value, and clearances.
Common mistakes during chimney liner installation
Most reline problems show up within a year of the work. They tend to fall into the same few categories.
- Undersizing or oversizing the flue. A liner that is too large cools the gases and dumps creosote onto the walls. A liner that is too small chokes the draft and pushes smoke into the room.
- Skipping the insulation layer. An uninsulated stainless liner in a wood-burning chimney runs cooler, collects more creosote, and may not survive a chimney fire.
- Wrong stainless alloy. 304 stainless is acceptable for most wood applications. 316L is used in coastal areas or for coal. The wrong alloy rusts out early.
- Bad connections. Loose clamps, mismatched diameters, and unsealed joints leak combustion gases into the home.
- No permit, no inspection. The work may look fine but will fail at a future home sale or an insurance claim.
- Reusing a damaged connector. A new liner on top of a cracked or rusted stovepipe is a common corner-cut that undoes the safety benefit of the new liner.
Costs, time, and what affects both
The price of a chimney liner installation is driven by the same handful of variables. Once those are known, contractor quotes become easier to compare.
| Variable | How it changes the job | Cost impact |
|---|---|---|
| Chimney height | Longer liner, more labor to feed and secure | $200 – $600 per extra story |
| Number of offsets | Flexible liner needed, slower install | $300 – $1,000 |
| Liner diameter | 6 in, 8 in, and 10 in liners cost different amounts | $100 – $400 per diameter step |
| Insulation | Wrapped blanket vs. poured insulation | $300 – $800 |
| Chimney condition | Cracked crown, spalling brick, missing cap | $400 – $1,500 in repairs |
| Permit and inspection | Standard municipal fee | $75 – $300 |
For a one-story home with a straight chimney and a single wood stove, the realistic range in 2026 is roughly $2,000 to $4,000 for a code-compliant stainless reline. Multi-story homes, offset chimneys, and masonry repairs push the price into the $5,000 to $8,000 range. The lower outlier quotes that show up in online ads often skip the insulation, the permit, or the inspection, and they are worth asking about directly.
DIY chimney liner installation: when it is and is not appropriate
Some homeowners with a straight, accessible chimney, an existing cleanout, and a single wood stove do install their own liner. The work is physically heavy and there is no margin for error, but the steps themselves are documented by the manufacturers and the relevant codebooks.
DIY installation is reasonable when:
- The chimney is a straight vertical run without offsets.
- The homeowner has already done a camera inspection and knows the flue condition.
- Local code allows an owner to pull the permit on their own property.
- The work will be inspected by a certified chimney sweep at the end.
DIY installation is a poor fit when the chimney has offsets, the flue is heavily damaged, the home is two or more stories, or the work involves any gas appliance. A licensed professional is also the right call when an insurance company has already asked for documentation, because the installer’s certification and the inspection record carry weight in a claim.
Maintaining a chimney liner after installation
A new liner does not end the maintenance. It resets the clock.
- Annual sweeping. A Level 1 inspection and sweeping is the standard for a wood-burning system in regular use. A level 2 inspection is appropriate after a change of ownership or after any change to the appliance.
- Burn the right fuel. Seasoned hardwood with moisture content below about 20 percent burns cleaner and produces less creosote. Green wood is the single most common cause of creosote buildup.
- Watch for warning signs. A smoky firebox, a smell of creosote on a warm day, or a visible change in draft all justify an inspection.
- Keep records. The installer’s paperwork, the permit, and the inspection report should be filed with the home’s records. They matter at resale and at claim time.
Working with a chimney professional
There is a real quality range between contractors, and a few questions help separate the careful ones from the rest. The list below is short on purpose; it is the minimum a homeowner should ask before any work starts.
- Are you certified through the Chimney Safety Institute of America, and can you show the credential?
- Will the work be permitted and inspected by the local building department?
- What liner brand, alloy, and diameter are you specifying, and why that size for my appliance?
- Is insulation included, and what is its R-value?
- Will a camera inspection be done before and after the install, and will I receive a copy?
- What is the warranty on the liner and on the labor, in writing?
A contractor who answers these questions on the first visit is generally a contractor who has done the work many times. One who cannot explain the sizing or who is vague about the permit is worth a second quote.
Putting the pieces together
Chimney liner installation is not a decorative upgrade. It is the part of the chimney system that actually carries combustion gases out of the home, and it is the part most likely to be undersized, damaged, or missing in older houses. The right liner, correctly sized, properly insulated, and installed to a recognized standard, is what makes a wood stove or fireplace safe to keep using.
Start with a camera inspection and a clear answer to two questions: what is venting the appliance now, and what does the manufacturer say it should be venting into. The gap between those two answers is the scope of the work. From there, choose the liner type that matches the appliance, confirm the sizing on paper, pull the permit, and confirm that the finished work is inspected. That is the entire job, done correctly.
Frequently asked questions
How long does chimney liner installation take?
For a single-story home with a straight chimney, the work usually takes half a day to a full day. Multi-story homes, offset chimneys, and chimneys that need masonry repair can take two to three days.
Do I really need a new chimney liner to install a wood stove?
Often yes. If the existing flue is unlined, damaged, or the wrong size for the new stove, the manufacturer and most local codes require a correctly sized liner. A wood stove installed on an oversized flue will draft poorly and will produce heavy creosote.
What is the difference between a 304 and 316L stainless liner?
304 stainless is the standard choice for most wood and gas applications. 316L has higher corrosion resistance and is used in coastal areas and with coal. Using the wrong alloy shortens the liner’s life.
Can an existing clay tile flue be relined without removing the tile?
Yes. A stainless steel liner or a poured-in-place liner is installed inside the existing tile. The tile is left in place as a secondary barrier, and the new liner carries the flue gases.
Is insulation around the liner really required?
For wood-burning systems, yes. Insulation keeps the flue gases hot, which improves draft and reduces creosote. It also protects the surrounding masonry during a chimney fire. Manufacturers and inspectors treat insulation as part of the listed system, not an optional add-on.
How do I know the new liner is the right size?
The liner is sized to match the appliance, not the existing chimney. The stove or insert manufacturer’s installation manual specifies the required flue area or minimum diameter. The installer then uses that figure to pick a 6-inch, 7-inch, or 8-inch liner.
What happens if the chimney liner installation is not permitted?
Unpermitted work can create problems at resale, may void the homeowner’s insurance coverage for a chimney-related loss, and can leave the system in a state that does not meet code. The permit and inspection are the only way to confirm the work is actually code-compliant.
Can a flexible liner be cleaned the same way as a masonry flue?
Yes. Annual sweeping with a poly or wire brush sized to the liner is standard. The brush runs the full length of the liner and clears creosote from the corrugations.
How long does a stainless steel chimney liner last?
A properly sized, insulated, and maintained stainless liner commonly lasts 15 to 25 years, and longer in some installations. Burning green wood or running a chimney fire shortens the life considerably.
Is chimney liner installation something a homeowner can do themselves?
It can be, on a straight single-story chimney with a clean flue and a clear permit path, provided the work is inspected at the end. For offset chimneys, masonry repairs, or gas appliances, a licensed professional is the safer choice.

Leave a Reply