

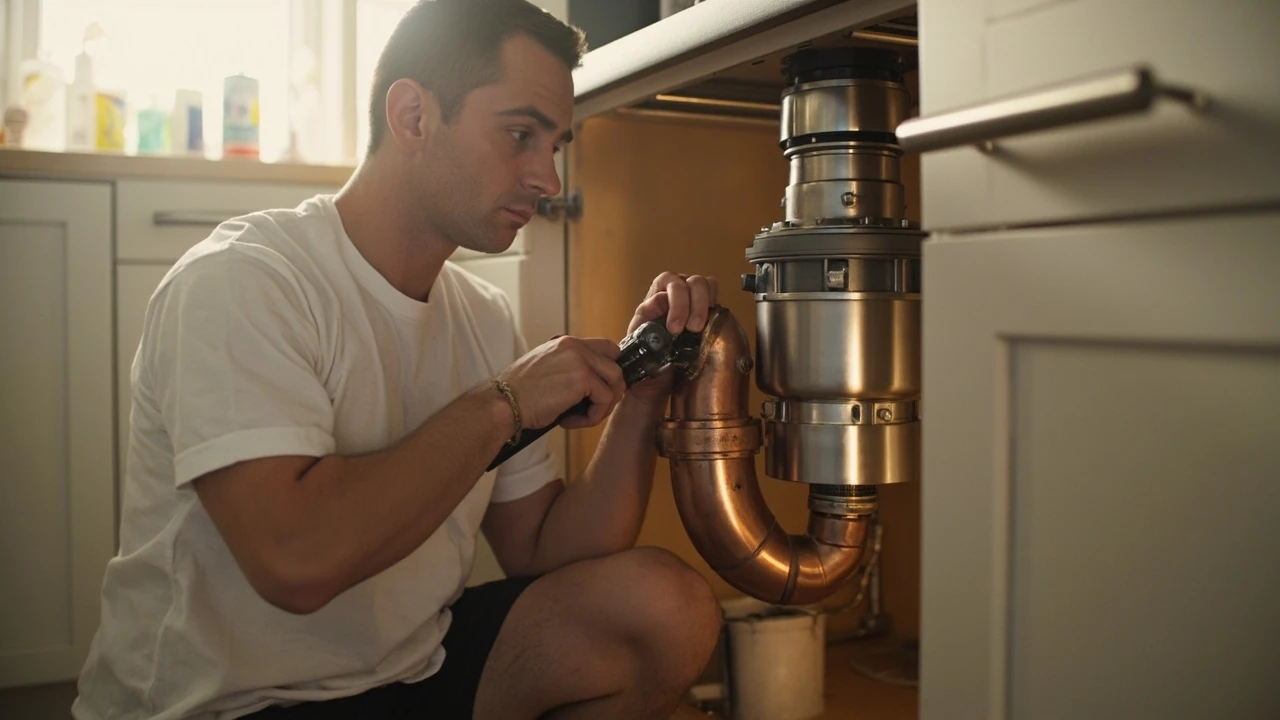
Garbage disposal replacement: when to do it and how to think it through
A garbage disposal rarely dies at a convenient moment. It usually gives up while a sink full of potato peels waits to be ground, or it starts leaking a slow, dark line across the cabinet floor that you only notice when the trash can underneath is soaked. Homeowners often delay a garbage disposal replacement for months, treating the unit as a minor appliance, until the smell, the noise, or the recurring clogs make the choice obvious. The good news is that replacing a disposal is one of the more predictable plumbing jobs in a U.S. home, and thinking it through before the old unit fails makes the difference between a calm Saturday project and an emergency callout.
This guide walks through the practical decisions behind a garbage disposal replacement: how to recognize a unit that has reached the end of its useful life, how to size and choose a new model, what the actual installation involves, what it tends to cost, and how to keep the new unit from repeating the same mistakes. It is written for U.S. homeowners who want a clear, no-fluff path through a job that is often oversold by contractors and oversimplified by big-box aisles.
How to tell that a garbage disposal actually needs replacement
Not every disposal problem means you need a new unit. Some of the most common symptoms are also the most fixable, and replacing a disposal that only needed a cleared jam is an expensive way to learn the difference. Before scheduling a garbage disposal replacement, run through a short diagnostic so you do not pay for a new machine when a ten-minute repair would do.
A disposal that hums but does not turn is almost always jammed, not dead. The motor has power, the switch works, and the impellers are simply stuck against something hard, often a bone fragment, a fruit pit, or a spoon that slipped past the splash guard. A garbage disposal unit uses a high-torque electric motor that spins a turntable with impellers to fling waste against a grind ring, and that mechanical path can stall on exactly the wrong object. Most units have a hex socket on the bottom of the motor shaft; an Allen wrench turned back and forth usually frees the jam. If the reset button on the bottom of the unit pops back in and the disposal spins normally after that, the unit is fine.
A disposal that leaks is a different story. Water under the sink is the most common reason homeowners start a garbage disposal replacement, and there are three places those leaks come from:
- The flange where the disposal mounts to the sink drain. This is the most common leak and is often caused by a worn putty seal or a loose mounting ring.
- The dishwasher inlet on the side of the disposal, where a small hose nipple connects to the dishwasher drain hose. A degraded rubber gasket or a loose hose clamp will drip steadily when the dishwasher runs.
- The lower body of the unit itself, usually near the seams or the motor housing. Water coming from the body of the disposal means the internal seals have failed.
Leaks at the flange and the dishwasher inlet are repairable without replacing the disposal. A new bead of plumber’s putty, a fresh gasket, or a new hose clamp is a low-cost fix. A leak from the body of the unit is not, and that is one of the clearest signals that a garbage disposal replacement is the right call.
Age and noise are the subtler signals. Most disposals last 8 to 15 years depending on use, water quality, and the harshness of the waste they handle. A unit that is more than ten years old, that has been repaired more than once, that smells persistently even after cleaning, or that has shifted from a quick grind to a long, labored one is at the end of its run. A grinding chamber that has lost sharpness makes the motor work harder, which in turn trips the thermal overload and shortens the life of the bearings.
Common reasons homeowners start a garbage disposal replacement
The everyday triggers for a garbage disposal replacement are remarkably consistent across U.S. households. The table below summarizes the most common reasons plumbers are called, how often each one actually requires replacement, and what a homeowner should check first.
| Symptom | How often it requires replacement | What to check first |
|---|---|---|
| Hums but does not grind | Rarely | Hex socket on bottom of motor, reset button, power switch |
| Leaks at the sink flange | Sometimes | Plumber’s putty, mounting ring tightness |
| Leaks at dishwasher inlet | Rarely | Hose clamp, rubber gasket |
| Leaks from the unit body | Almost always | Replace the unit |
| Recurring clogs in the adjacent drain | Sometimes | P-trap, drain line, usage habits |
| Persistent bad odor | Sometimes | Deep clean, ice and citrus grind, biofilm in splash guard |
| Loud metallic rattling or knocking | Often | Foreign object, worn impellers, damaged grind ring |
| Repeatedly tripped reset button | Often | Motor wear, jam, undersized unit for the household |
Two of the items above are worth a closer look because they are the most over-diagnosed. A disposal that backs up into the second sink basin is usually a clogged drain line, not a failed unit, and a disposal that smells like rotting food is usually a dirty splash guard and a biofilm problem, not a dead motor. Both can be confirmed with simple checks before committing to a replacement.
Choosing the right replacement unit
Once the decision to replace is made, the next question is which unit to put in. Most U.S. disposals fall into a small number of size categories, and the right size is driven more by household habits than by the sink’s dimensions. A two-person household that grinds only soft food waste does not need the same machine as a family of five that puts everything from chicken bones to fruit rinds down the drain.
Motor size and what it actually means
Disposal horsepower is the most advertised number and the most misleading. Residential units are commonly sold in third-horsepower, half-horsepower, three-quarter-horsepower, and one-horsepower tiers. The practical differences show up in three places:
- How quickly the unit grinds a typical load. Higher horsepower means a faster grind and a shorter run, which is easier on the motor.
- How well the unit handles harder waste. Fibrous waste like celery, corn husks, and artichokes are the most common culprits in jammed units, and more torque handles them more reliably.
- How loud the unit is. Higher-horsepower units often pair with better sound insulation, but the relationship is not perfect, and decibel ratings on the box are not directly comparable across brands.
For a typical U.S. household, a half-horsepower continuous-feed unit is a sensible baseline. A three-quarter-horsepower unit is a meaningful step up for households that cook daily and grind frequently. A third-horsepower unit is acceptable for very light use but tends to struggle with anything beyond soft scraps, and that struggle is what shortens the life of the machine.
Continuous feed versus batch feed
Most disposals sold in the U.S. are continuous-feed units, which run as long as the switch is on and the cover is in place. Batch-feed units run only when a special cover is locked into place over the opening, which is a real safety feature in households with small children. The trade-off is convenience: a batch-feed unit requires placing the cover and twisting it into position before each use, which most adults find tedious over time.
Unless a household has a specific reason to want a batch-feed unit, continuous feed is the standard choice and the easier swap for a direct garbage disposal replacement.
Feed type, mount type, and plumbing compatibility
Before buying, measure the space under the sink. The two constraints that drive most returns are height from the bottom of the sink to the cabinet floor, and the side clearance to the drain line and the dishwasher drain hose. Most disposals need at least 12 inches of vertical clearance below the sink basin, and a few of the higher-horsepower units need 14 or more.
Plumbing compatibility matters because the new unit has to connect to the existing P-trap and dishwasher drain. The vast majority of U.S. disposals use a standard 1.5-inch or 1.25-inch discharge tube, and the included tailpiece fits the common P-trap configurations. In older homes with non-standard plumbing, a short PVC or rubber transition piece is usually enough to make the connection work.
Replacement cost: what homeowners actually pay
Garbage disposal replacement costs vary widely because the price is split between the unit itself and the labor. The table below summarizes typical U.S. ranges in 2026 dollars for a straightforward like-for-like swap with no plumbing changes. Prices vary by region, contractor, and whether the work is bundled with another visit, so use these as a planning baseline, not a quote.
| Cost component | Typical range | What drives the number |
|---|---|---|
| Economy unit (1/3 to 1/2 HP) | $80 to $150 | Basic continuous feed, plastic or light stainless grind components |
| Mid-range unit (1/2 to 3/4 HP) | $150 to $350 | Better sound insulation, stainless grind components, longer warranty |
| Premium unit (3/4 to 1 HP) | $350 to $700 | Higher torque, premium sound insulation, longer warranties |
| Plumber labor for like-for-like swap | $150 to $400 | Regional labor rates, accessibility, and whether new wiring is needed |
| Handyman labor for like-for-like swap | $100 to $250 | Permitted in many jurisdictions for direct swaps without new circuits |
| Electrical work (new cord, switch, or circuit) | $75 to $300 | Whether the existing wiring is code-compliant and the location of the outlet |
A straightforward like-for-like garbage disposal replacement by a licensed plumber usually lands in the $300 to $700 range all-in, with most of the variation coming from the unit chosen and the local labor rate. A DIY installation is materially cheaper, but it requires a basic comfort with under-sink plumbing, a helper to hold the unit in place while you tighten the mounting ring, and a careful eye for the electrical side, which is the only part of the job that carries real safety risk.
DIY or hire a pro: how to decide
A direct garbage disposal replacement is one of the more accessible DIY plumbing jobs for a homeowner who is comfortable with basic tools. The mechanical steps are simple: disconnect the drain, disconnect the dishwasher hose, unthread the mounting ring, drop the old unit, reverse the process with the new unit, and reconnect everything with fresh putty and gaskets. The tools are common: a plumber’s wrench, a screwdriver, a putty knife, and a helper’s hand to hold the weight of the unit under the sink.
There are three situations where hiring a licensed plumber is the right call, even for a handy homeowner:
- The existing electrical connection is a hardwired junction inside the disposal housing rather than a plug-in cord. In that case, the new unit must be wired in by someone comfortable with line voltage, and the work should be inspected in jurisdictions that require it.
- The sink flange is corroded, the mounting assembly is stuck, or the existing plumbing is non-standard. A plumber can replace the flange and any damaged parts in the same visit, which avoids a second trip if the DIY swap goes sideways.
- There is a permit or code issue in the local jurisdiction. Most like-for-like replacements do not require a permit, but new electrical circuits, new plumbing runs, and work in some multi-family buildings do. A local plumber will know the rule in your city.
For a straight like-for-like swap with a plug-in cord and a standard plumbing configuration, a careful DIY install is reasonable, and it saves a meaningful share of the total cost. For anything that touches the electrical panel, the wiring inside the junction box, or the flange itself, the cost of a plumber is the cost of avoiding a leak, a tripped breaker, or a callback.
Step-by-step: what a like-for-like replacement actually involves
The steps below describe a common like-for-like garbage disposal replacement on a U.S. kitchen sink with a plug-in disposal and a standard P-trap. The order matters because under-sink spaces are tight, and small mistakes compound quickly when the new unit is heavy and the old one is leaking.
- Turn off power to the disposal at the wall switch and the breaker. Verify the unit is dead with a non-contact voltage tester at the outlet or cord.
- Place a bucket under the P-trap and disconnect the discharge tube. Expect a small amount of water in the trap.
- Disconnect the dishwasher drain hose from the disposal inlet and plug the hose with a rag or a cap to keep drain water from running into the cabinet.
- Unplug the disposal cord from the under-sink outlet. If the unit is hardwired, remove the cover plate and disconnect the wire nuts, taking a photo of the wiring for reference.
- Use a screwdriver or the disposal’s special wrench to rotate the mounting ring until the old disposal drops free. Have a helper ready because the unit is heavier than it looks.
- Clean the sink flange thoroughly and remove the old plumber’s putty. Inspect the flange for cracks and replace it if it is pitted or corroded.
- Roll a new bead of plumber’s putty and press the flange into the sink opening. Place a weight on the flange or have a helper hold it from above while you work below.
- Set the new disposal onto the mounting ring and rotate the ring to lock the unit in place. Tighten until the unit sits firmly without rocking.
- Reconnect the discharge tube to the P-trap and the dishwasher hose to the inlet. Use a new hose clamp and a fresh gasket if the old ones are degraded.
- Restore power, run water into the sink, and test the unit with a small load of soft food waste. Check every connection for leaks before walking away.
Two practical notes from real installations. First, a helper is not optional for most people. Holding the disposal in place under the sink while threading the mounting ring from above is awkward and physically uncomfortable, and the weight of the unit is the main reason DIY installs go wrong. Second, the leak test is the part that gets skipped. Run water for a full minute, run the disposal, and put a dry paper towel on every joint. The leak that you find on the paper towel is the one you actually fix; the one you find next week is the one that ruins the cabinet floor.
Wiring and electrical safety
Most U.S. disposals are powered either through a plug-in cord that connects to an under-sink outlet, or through a hardwired connection inside the disposal’s junction box. The plug-in configuration is the safer and more common setup today. If the old unit is hardwired and the new unit comes with a cord, the choice is whether to install a new outlet under the sink or to keep the hardwired configuration with a new cord whip. Either is acceptable if the work is done to local code.
A garbage disposal draws 4 to 8 amps under load depending on the horsepower, which is well within a standard 15- or 20-amp circuit. The circuit should be dedicated to the disposal and the dishwasher, which is the standard wiring pattern in most U.S. homes. If the breaker trips immediately after the new unit is installed, the most common causes are a pinched wire under the mounting ring, a loose wire nut in the junction box, or a ground fault on a wet plug. None of these are unit defects, and all of them are fixable without replacing the disposal.
For a quick reference on how a disposal is wired into a kitchen circuit and the typical amperage draw, the garbage disposal unit article describes the basic motor configuration and the historical context for residential wiring in the United States. It is a useful starting point for understanding what your electrician or plumber is working with, especially in older homes where the original circuit may not be code-compliant today.
Common mistakes during a replacement
Most problems with a new garbage disposal are not problems with the new unit. They are problems with the install. The list below covers the mistakes that show up most often in service calls within the first month of a replacement.
- Skipping plumber’s putty and using only a rubber gasket. A rubber gasket alone is acceptable on some newer disposals, but the original plumbing code in most U.S. jurisdictions still expects a putty seal at the flange.
- Overtightening the mounting ring. The ring should be snug, not gorilla-tight. Overtightening cracks the sink flange and creates a slow leak that does not show up until the cabinet is stained.
- Reusing the old gasket at the dishwasher inlet. The rubber hardens and crushes during disassembly and will not reseal.
- Forgetting to remove the knockout plug on the dishwasher inlet. New disposals ship with a plastic knockout plug in the dishwasher port that must be removed before the unit is installed, or the dishwasher will back up into the sink.
- Failing to test for leaks with a full water flow. A slow trickle is not the same as a normal operating flow, and a leak that does not show up under a trickle will show up the first time a large pot of pasta water is drained.
For households that are also doing other kitchen or plumbing work, it is worth thinking about timing. A garbage disposal replacement is a one-day job, but it tends to expose other small problems in the under-sink area, including aging P-traps, brittle dishwasher hoses, and shutoff valves that no longer fully close. Budgeting for one or two small parts beyond the disposal itself is realistic, and it prevents a second trip to the hardware store in the middle of the install.
How to extend the life of the new unit
Garbage disposals are mechanically simple, and a few habits do most of the work of keeping them running for a decade or more. The most important habit is also the easiest: run cold water before, during, and after every use. Cold water solidifies grease so the blades can break it up, and it carries the ground waste out of the chamber before it can settle. Hot water softens grease and lets it coat the grinding chamber, which is the most common cause of odor and slow drains.
Equally important is what goes in. The list below is short, and it is the list most manufacturers keep on the side of the box.
- Fibrous waste: celery, corn husks, artichokes, asparagus, onion skins. These wrap around the impellers and jam the motor.
- Starchy waste: pasta, rice, potato peels in large quantities. These expand with water and form a paste that clogs the drain.
- Grease and oil. Fats coat the grinding chamber and the drain line.
- Hard objects: bones, fruit pits, shellfish shells. The unit can handle small soft bones, but a thick beef bone will stall the motor.
- Non-food items: glass, metal, plastic, paper. These do not grind and they damage the chamber.
A monthly cleaning with ice and a small amount of coarse salt scours the chamber and sharpens the impellers. A citrus peel run after the ice leaves the chamber smelling fresh. Baking soda and vinegar are popular online, but the chemistry is mild and the actual benefit is mostly in the rinse water that follows. The most effective odor control is a clean splash guard, which is the rubber baffle at the top of the disposal and the part most people forget to clean.
When replacement is the wrong call
There is a case for not replacing a disposal at all. Households in jurisdictions that restrict food waste in the sewer system may want to confirm the local rule before installing a new unit, especially in multi-family buildings. Some older homes have drain lines that are too small or too corroded to handle a disposal, and a new unit on an inadequate drain will clog repeatedly until the drain itself is replaced. And households that have moved away from grinding food waste for composting reasons may find that removing the disposal entirely and capping the drain is a cleaner long-term answer than replacing the unit.
There is also a case for upgrading rather than replacing like-for-like. A household that has fought recurring clogs for years may be ready for a higher-horsepower unit with better grinding, or for a batch-feed unit that prevents accidental misuse. A household that has replaced a disposal three times in ten years is usually grinding the wrong things, and the right answer is a household conversation about what goes in, not a more powerful machine.
How a garbage disposal replacement fits into broader home upkeep
Garbage disposal replacement sits in an unusual place in the home maintenance calendar. It is not a routine annual task like a furnace tune-up, and it is not a one-time project like a roof replacement. It is a mid-life event for a single appliance that fails on its own schedule, often without warning. Homeowners who think of it as a planned project rather than an emergency tend to make better decisions: they choose the right unit rather than the one the plumber happens to have in the truck, they install it before the cabinet floor is damaged, and they avoid the after-hours labor premium that comes with a Sunday-night leak.
For homeowners who are also thinking about other kitchen or plumbing upgrades, a garbage disposal replacement is a good moment to inspect the P-trap, the shutoff valves, the dishwasher drain hose, and the under-sink electrical outlet. None of these are expensive, and catching a corroded valve or a brittle hose during the same visit as the disposal install is far cheaper than a second service call later. It is also a good moment to think about whether the cabinet floor under the sink needs a waterproof mat or a replacement panel, especially in older homes where previous leaks have left stains or soft spots.
If you are weighing a garbage disposal replacement against other home repairs, it helps to put the cost in context. The all-in price of a mid-range replacement is comparable to a window glass replacement for a single pane, well below a water main repair, and roughly the same as a basic service visit for a household system. It is one of the more affordable plumbing jobs a homeowner will face, which is part of why it is easy to leave it until the unit fails completely.
Frequently asked questions
How long does a garbage disposal usually last before it needs replacement?
Most residential disposals last 8 to 15 years. Units used heavily in large households tend to land at the shorter end, while units used lightly in small households can last 15 years or more. The most common reasons for replacement before 10 years are leaks from the unit body, persistent jams, and a grinding chamber that has lost sharpness.
Can I install a new garbage disposal myself?
A direct like-for-like replacement with a plug-in cord is a reasonable DIY project for a homeowner comfortable with basic plumbing tools and a helper to hold the unit. The job involves disconnecting the drain and dishwasher hose, swapping the unit, resealing the flange, and reconnecting everything. If the existing unit is hardwired, the sink flange is corroded, or the local code requires a licensed installer for electrical work, hiring a plumber is the safer choice.
What size garbage disposal should I buy for a family of four?
For a family of four that cooks daily, a half-horsepower continuous-feed unit is a sensible baseline, and a three-quarter-horsepower unit is a meaningful step up if the household grinds fibrous waste like celery and corn husks. Higher horsepower is not necessary for most households and adds cost and weight without changing the actual grinding outcome for soft food waste.
Why does my new disposal leak at the dishwasher inlet?
The most common cause is a degraded rubber gasket or a loose hose clamp at the dishwasher drain hose connection. A new gasket and a tightened clamp is usually all that is needed. If the inlet nipple on the disposal itself is cracked, the unit should be replaced under warranty.
Do I need a permit to replace a garbage disposal?
Most U.S. jurisdictions do not require a permit for a like-for-like replacement with no new electrical or plumbing runs. New circuits, new plumbing, and some multi-family buildings do require permits. A local plumber or the city building department can confirm the rule for your specific address.
Is it worth upgrading to a higher-horsepower disposal?
For households that grind frequently, that cook with fibrous waste, or that have had recurring clogs with a smaller unit, a higher-horsepower disposal is worth the upgrade. The faster grind means a shorter run, less motor stress, and a lower chance of jam. For households that grind only soft waste occasionally, the upgrade is more about noise insulation and warranty than raw grinding power.
What should I do if my garbage disposal hums but does not turn?
Turn off the power, then use an Allen wrench in the hex socket on the bottom of the motor to rotate the impellers back and forth. Clear the obstruction, press the reset button on the bottom of the unit, and test again. A hum with no movement is almost always a jam, not a failed motor, and does not require replacement on its own.
Can I put a garbage disposal in a sink that does not have one?
Yes, but the install is more involved than a like-for-like replacement. It requires a sink flange that fits the existing drain, a mounting assembly, an electrical connection (either an existing outlet or a new circuit), and confirmation that the local plumbing and sewer rules allow a disposal. Many plumbers can quote this work as a half-day job.
How do I get rid of a persistent garbage disposal odor?
Clean the splash guard at the top of the disposal, which is the part most people miss. Then run a tray of ice with a small amount of coarse salt through the unit to scour the chamber, followed by a few citrus peels for scent. Persistent odor that does not respond to cleaning is usually a sign that food waste is sitting in the drain line beyond the disposal, not in the unit itself.
What happens to the food waste ground by a disposal?
Ground food waste is flushed into the household drain and travels to the municipal wastewater treatment plant, where it is processed along with other organic solids. Modern treatment plants are designed to handle food waste through the sewer, and biosolids from the treatment process can be used as fertilizer. Garbage disposals do not eliminate food waste; they change how it is managed.

Leave a Reply